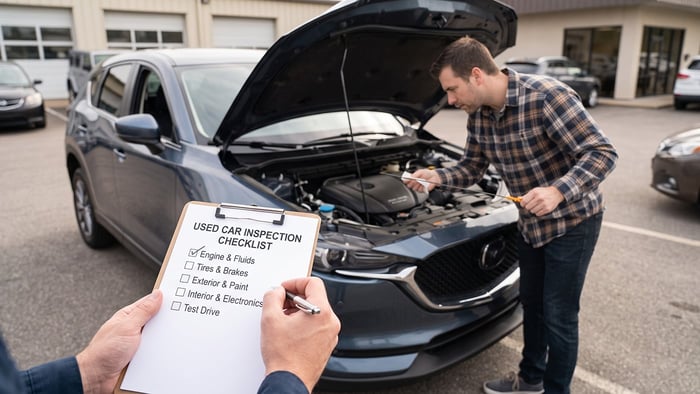

Buying a used car mostly comes down to finding out what the seller didn't mention. You don't need to be a mechanic to catch the majority of problems — you need a solid used car inspection checklist, a flashlight, and about 45 minutes.
This guide covers what to check before you buy, in the order we'd actually do it: paperwork first, then the walkaround, tires, under the hood, the cabin, the test drive, and finally a professional set of eyes.
Table of Contents
- Step 1: Check the VIN, History Report, and Recalls Before You Go
- Step 2: Walk Around the Outside
- Step 3: Inspect the Tires and Wheels
- Step 4: Look Under the Hood (With the Engine Cold)
- Step 5: Go Through the Interior
- Step 6: Take a Real Test Drive
- Step 7: Get a Professional Pre-Purchase Inspection
- Step 8: Review the Paperwork and Know Your Warranty Rights
- Red Flags That Mean You Should Walk Away
- Your Printable Used Car Inspection Checklist
- The Bottom Line: A Little Homework Now Saves a Lot Later
- FAQs
Step 1: Check the VIN, History Report, and Recalls Before You Go
The cheapest inspection is the one you do from your couch. Ask the seller for the 17-character VIN before you schedule a visit. A seller who won't share it is telling you something.
With the VIN in hand:
- Run a vehicle history report. A Carfax or VinAudit report shows reported accidents, the number of owners, odometer readings over time, and — most importantly — title brands like salvage, rebuilt, flood, or lemon buyback. Many dealers include a report with the listing already.
- Look for open recalls. Enter the VIN at NHTSA.gov/recalls. It's free, and recall repairs are done at no cost by a franchised dealer for that brand. An open recall isn't a dealbreaker, but you want to know about it.
- Compare mileage to the story. An odometer reading that goes backward between service visits is a serious red flag.
When you arrive, match the VIN on the dashboard (visible through the windshield), the driver's door jamb sticker, and the title. All three should agree. If you're buying from a private party, the name on the title should match the seller's ID, and the title shouldn't show an unreleased lien.
Step 2: Walk Around the Outside
What to bring to the inspection
- A bright LED flashlight (your phone light works in a pinch, but a real one is better under the car)
- A tire tread depth gauge — or a penny and a quarter
- A small magnet wrapped in a thin cloth, for finding body filler
- Paper towels or a rag for checking fluids
- An OBD2 code reader (optional, but around $20–$40 and worth it)
- A friend — one person watches the lights and exhaust while the other runs the controls
CarSoup may earn a commission from qualifying purchases made through links on this page. As an Amazon Associate, CarSoup earns from qualifying purchases.
Do this in daylight, on dry pavement, with the car clean. Rain and darkness hide a lot. Start at one corner and work your way around slowly, then crouch down and look along each side from the front and rear — ripples and waves in the reflection point to bodywork.
| What to check | What you're looking for |
|---|---|
| Panel gaps | The spacing between the hood, fenders, doors, and trunk should be even on both sides. Wide or uneven gaps often mean a panel was replaced or realigned after a crash. |
| Paint | Slight color mismatches between panels, overspray on rubber trim or window seals, and orange-peel texture on one panel only are all signs of repaint work. |
| Body filler | Slide your cloth-wrapped magnet along the lower doors and fenders. If it won't stick in one spot but grabs everywhere else, there's likely filler underneath. (Doesn't work on aluminum or plastic panels.) |
| Rust | Check rocker panels, wheel arches, door bottoms, the tailgate or trunk lip, and around the fuel door. Bubbling paint means rust is already working from the inside. |
| Glass | Chips and cracks in the windshield, plus the brand etched in the corner of each window — one mismatched window can mean a replacement after a break-in or accident. |
| Lights | Hazy or yellowed headlight lenses, moisture inside a housing, and any burned-out bulbs. Have your friend confirm brake lights and turn signals. |
| Underneath | With your flashlight, look at the frame rails, brake lines, and exhaust. Light surface rust is normal on almost any used car. Flaking, scaling, or holes in the frame are not. |
If the car spent its life in a salt-belt state, give the underside extra attention. Our guide to spotting hidden winter damage goes deeper on what salt and potholes do to a vehicle.
Step 3: Inspect the Tires and Wheels
Tires tell you two things: how much money you're about to spend, and how the car has been treated.
- Tread depth. Legal minimum in most states is 2/32 of an inch, but traction on snow and slush drops off well before that. Stick a penny in the tread with Lincoln's head upside down — if you can see the top of his head, you're at or below 2/32 and need tires now. A quarter works the same way: if you can see the top of Washington's head, you're under 4/32, which is where most tire makers suggest replacing for winter driving. A tread depth gauge takes the guesswork out.
- Wear pattern. Even wear across the tread is what you want. Wear on just the inner or outer edge points to an alignment problem or worn suspension parts. Scalloped, cupped wear often means tired shocks or struts.
- Tire age. The last four digits of the DOT code on the sidewall are the week and year it was made — "2319" means the 23rd week of 2019. Many tire makers recommend replacement around six years regardless of tread.
- Spare and tools. Confirm the spare (or inflator kit), jack, and lug wrench are actually in the car, along with the wheel lock key if it has locking lug nuts.
Step 4: Look Under the Hood (With the Engine Cold)
Ask the seller not to start the car before you arrive. A cold engine shows you how it really starts, and a warm one can hide rough idles, smoke, and noises that disappear once things heat up. If the hood is warm when you show up, note it.
- Engine oil. Pull the dipstick. The oil should be somewhere between honey-colored and dark brown and sit between the marks. A milky or foamy look — on the dipstick or under the oil fill cap — can point to coolant mixing with oil, which is expensive.
- Coolant. Check the level in the overflow reservoir only. Never open the radiator cap on a warm engine. Coolant should be clean and brightly colored, not rusty or sludgy.
- Transmission fluid. If there's a dipstick (many newer cars don't have one), the fluid should be red or pink and not smell burnt.
- Belts and hoses. Look for cracked or frayed belts. Hoses should feel firm, not mushy or brittle.
- Battery. Most batteries have a date sticker. Anything past four or five years is living on borrowed time, especially in a cold climate. White or green crust on the terminals is worth noting too.
- Leaks and stains. Look at the engine and the ground below for oil, coolant (often green, orange, or pink), or brake fluid. A spotless, freshly pressure-washed engine bay on an older car isn't automatically bad, but it can wash away evidence of a leak.
Step 5: Go Through the Interior
The interior is where you check whether the mileage on the dash matches the life the car has lived.
- Smell first. Open the door and breathe in. A musty, mildew smell usually means a water leak or past flooding. Heavy air freshener can be covering up smoke, pets, or the same problem.
- Check for water. Pull up the floor mats and press on the carpet, especially in the footwells and trunk. Look for rust on seat mounting bolts and a waterline or silt under the carpet — classic flood-car signs.
- Wear vs. mileage. A car showing 40,000 miles shouldn't have a shiny, worn steering wheel, a sagging driver's seat bolster, and pedal rubber worn to the metal.
- Warning lights. Turn the key to "on" without starting the engine. Every warning light should illuminate briefly as a bulb check. If the check engine or airbag light never comes on at all, someone may have disabled the bulb to hide a problem. Once the engine starts, they should all go out.
- Press every button. Windows, locks, mirrors, seat adjusters, heated seats, sunroof, wipers, horn, radio, Bluetooth, USB ports, and the backup camera. Run the heat on high and the A/C on max — both should blow hard and at the right temperature within a few minutes. Test the front and rear defrost.
Step 6: Take a Real Test Drive
Plan for at least 20 minutes, and try to cover stop-and-go streets, a rough road, and a stretch of highway. Keep the radio off.
- Cold start. Listen for rough idling, ticking, or knocking, and have your friend watch the tailpipe. Blue smoke suggests burning oil; thick white smoke that doesn't clear up after a minute can mean coolant is getting burned.
- Acceleration and shifting. Shifts should be smooth and predictable. Slipping, flaring RPMs, hard clunks into gear, or hesitation are transmission warning signs.
- Brakes. In a safe spot, brake firmly. The car should stop straight without pulling, and the pedal shouldn't pulse, feel spongy, or sink. Grinding means pads are gone.
- Steering and suspension. On a straight road, the car should track without constant correction. Clunks over bumps point to worn suspension parts.
- Tight turns. In an empty parking lot, turn the wheel to full lock and drive slow circles in both directions. Rhythmic clicking often means a worn CV joint.
- Highway speed. Vibration at 55–70 mph can be simple tire balance or a worn wheel bearing or driveshaft. Either way, have it checked.
After the drive, park on clean pavement, let it idle a few minutes, and check underneath for fresh drips. If you brought an OBD2 reader, plug it into the port under the dash. Beyond stored codes, look at the "readiness monitors." Several monitors showing "not ready" can mean the battery was recently disconnected or codes were cleared — sometimes innocently, sometimes to hide a check engine light right before a sale.
Step 7: Get a Professional Pre-Purchase Inspection
Your own used car inspection checklist catches a lot, but a mechanic with a lift catches more. A pre-purchase inspection (PPI) at an independent shop typically runs about $150 to $275, depending on the vehicle and how thorough the inspection is. On a car costing thousands of dollars, it's the best money you'll spend in the whole process.
A good PPI puts the car on a lift, scans every computer module (not just the engine), and measures brake pads and rotors. Ask for a written report with photos.
Most reputable dealers are happy to let you take a car for an independent inspection, and many private sellers are too — it protects them from a post-sale dispute. Certified pre-owned vehicles have already passed a manufacturer multi-point inspection, which is a real plus; our CPO warranty comparison breaks down what each brand's program covers. Even so, a second opinion on any car never hurts.
Step 8: Review the Paperwork and Know Your Warranty Rights
Every used car on a dealer's lot must display a Buyers Guide sticker, required by the Federal Trade Commission's Used Car Rule. It tells you whether the car is sold "as is" or comes with a warranty, and what that warranty covers. The Buyers Guide becomes part of your sales contract, so read it before you sign anything.
Buying from a licensed dealer in Minnesota also brings a state used car warranty law into play for many vehicles. Coverage depends on mileage at the time of sale:
| Mileage at sale | Minimum dealer warranty |
|---|---|
| Under 36,000 miles | 60 days or 2,500 miles, whichever comes first |
| 36,000 – 75,000 miles | 30 days or 1,000 miles, whichever comes first |
| 75,000 – 200,000 miles | 15 days or 500 miles, whichever comes first |
The law covers major components like the engine, transmission, drive axle, and brakes, but there are exclusions. Cars with 200,000+ miles, priced under $3,000, or eight or more years old are generally excluded (with some exceptions), along with salvaged vehicles, diesels, and a few other categories. Private-party sales aren't covered at all. The state Attorney General's car law guide has the full details. If you're weighing where to buy, our breakdown of private party vs. dealer purchases walks through the trade-offs.
Red Flags That Mean You Should Walk Away
Some problems are negotiating points. These usually aren't:
- A salvage, rebuilt, or flood title the seller didn't disclose upfront
- A VIN that doesn't match across the dash, door jamb, and title
- Structural frame rust with flaking, scaling, or holes
- Milky oil, or coolant disappearing with no visible leak
- A transmission that slips, flares, or bangs into gear
- Signs of flood damage — silt, waterlines, rusted seat bolts, a persistent musty smell
- A seller who refuses a pre-purchase inspection or won't share the VIN
There's always another car. Walking away from the wrong one is part of finding the right one.
Your Printable Used Car Inspection Checklist
Screenshot this and bring it with you.
| Check | Done | |
|---|---|---|
| ✓ | VIN & history: Carfax or VinAudit report reviewed, recalls checked, VINs match | ☐ |
| ✓ | Title: clean, in seller's name, no unreleased lien | ☐ |
| ✓ | Exterior: even panel gaps, matching paint, no filler, no bubbling rust | ☐ |
| ✓ | Underneath: frame, brake lines, and exhaust free of heavy rust or leaks | ☐ |
| ✓ | Tires: 4/32"+ tread, even wear, under ~6 years old, spare present | ☐ |
| ✓ | Engine bay: cold start, clean fluids at proper levels, belts and hoses OK | ☐ |
| ✓ | Interior: no musty smell or damp carpet, wear matches mileage | ☐ |
| ✓ | Electronics: warning lights check out, every button and the HVAC work | ☐ |
| ✓ | Test drive: smooth shifts, straight braking, no clunks, clicks, or vibration | ☐ |
| ✓ | Post-drive: no fresh drips, OBD2 scan and readiness monitors look normal | ☐ |
| ✓ | Pre-purchase inspection: written report from an independent mechanic | ☐ |
| ✓ | Paperwork: Buyers Guide read, warranty terms understood | ☐ |
The Bottom Line: A Little Homework Now Saves a Lot Later
A used car is one of the biggest purchases most of us make, and the 45 minutes you spend on this checklist is the cheapest insurance you'll find. Run the VIN, walk the car in daylight, check the tires and fluids, drive it like you'll own it, and let a mechanic have the final word. Most cars will pass with a few small notes you can use at the negotiating table, and the rare one that doesn't will show its problems before you've signed anything. Go in prepared, take your time, and you'll drive home knowing exactly what you bought.
Ready to start shopping?
Browse thousands of used cars, trucks, and SUVs from trusted local dealers on CarSoup.com, then bring this checklist along when you go see your top pick. New to the process? Start with our guide on how to buy a car without the stress.
FAQs
What should be on a used car inspection checklist?
A complete used car inspection checklist covers the vehicle history report and open recalls, a VIN match, an exterior and underbody walkaround for accident repairs and rust, tire tread and age, fluid levels and condition under the hood, interior wear and electronics, a test drive of at least 20 minutes, and a professional pre-purchase inspection.
How much does a pre-purchase car inspection cost?
Most independent shops charge roughly $150 to $275 for a pre-purchase inspection, depending on the vehicle and how detailed the inspection is. Luxury, European, and diesel vehicles can cost more.
Can I get a used car inspected before buying from a dealer?
Yes. Most reputable dealers allow buyers to take a vehicle to an independent mechanic for a pre-purchase inspection. Some will ask that the inspection happen at a nearby shop or that you leave a license or deposit. A refusal is worth taking seriously.
What are the biggest red flags when buying a used car?
Undisclosed salvage, rebuilt, or flood titles; a VIN that doesn't match across the car and paperwork; heavy frame rust; milky engine oil; a slipping transmission; flood damage signs; and a seller who refuses an independent inspection are all reasons to walk away.
How long should a used car test drive be?
Aim for at least 20 minutes, covering city streets, a rough road, and highway speeds. Start with a cold engine if you can, and check underneath for leaks after the drive.